Adding Billing Information - US Bank Accounts
Last updated: June 11, 2026
To start dispatching deliveries with Nash, you need to add your payment information. This guide shows you how to set up your US bank account for Nash Invoicing.
Only account owners and admins can manage billing information.
You may also pay by Debit/Credit card. Credit Cards, Debit Cards, or Link payments have a 3% processing fee.
Steps to Add Your US Bank Account
Click your username (email) in the bottom left corner.
Click Settings
Click billing on the left menu
Click Add Payment Method. A new window, powered by Stripe, will open for your bank details, or for you to add a card
Follow the steps to Add payment method
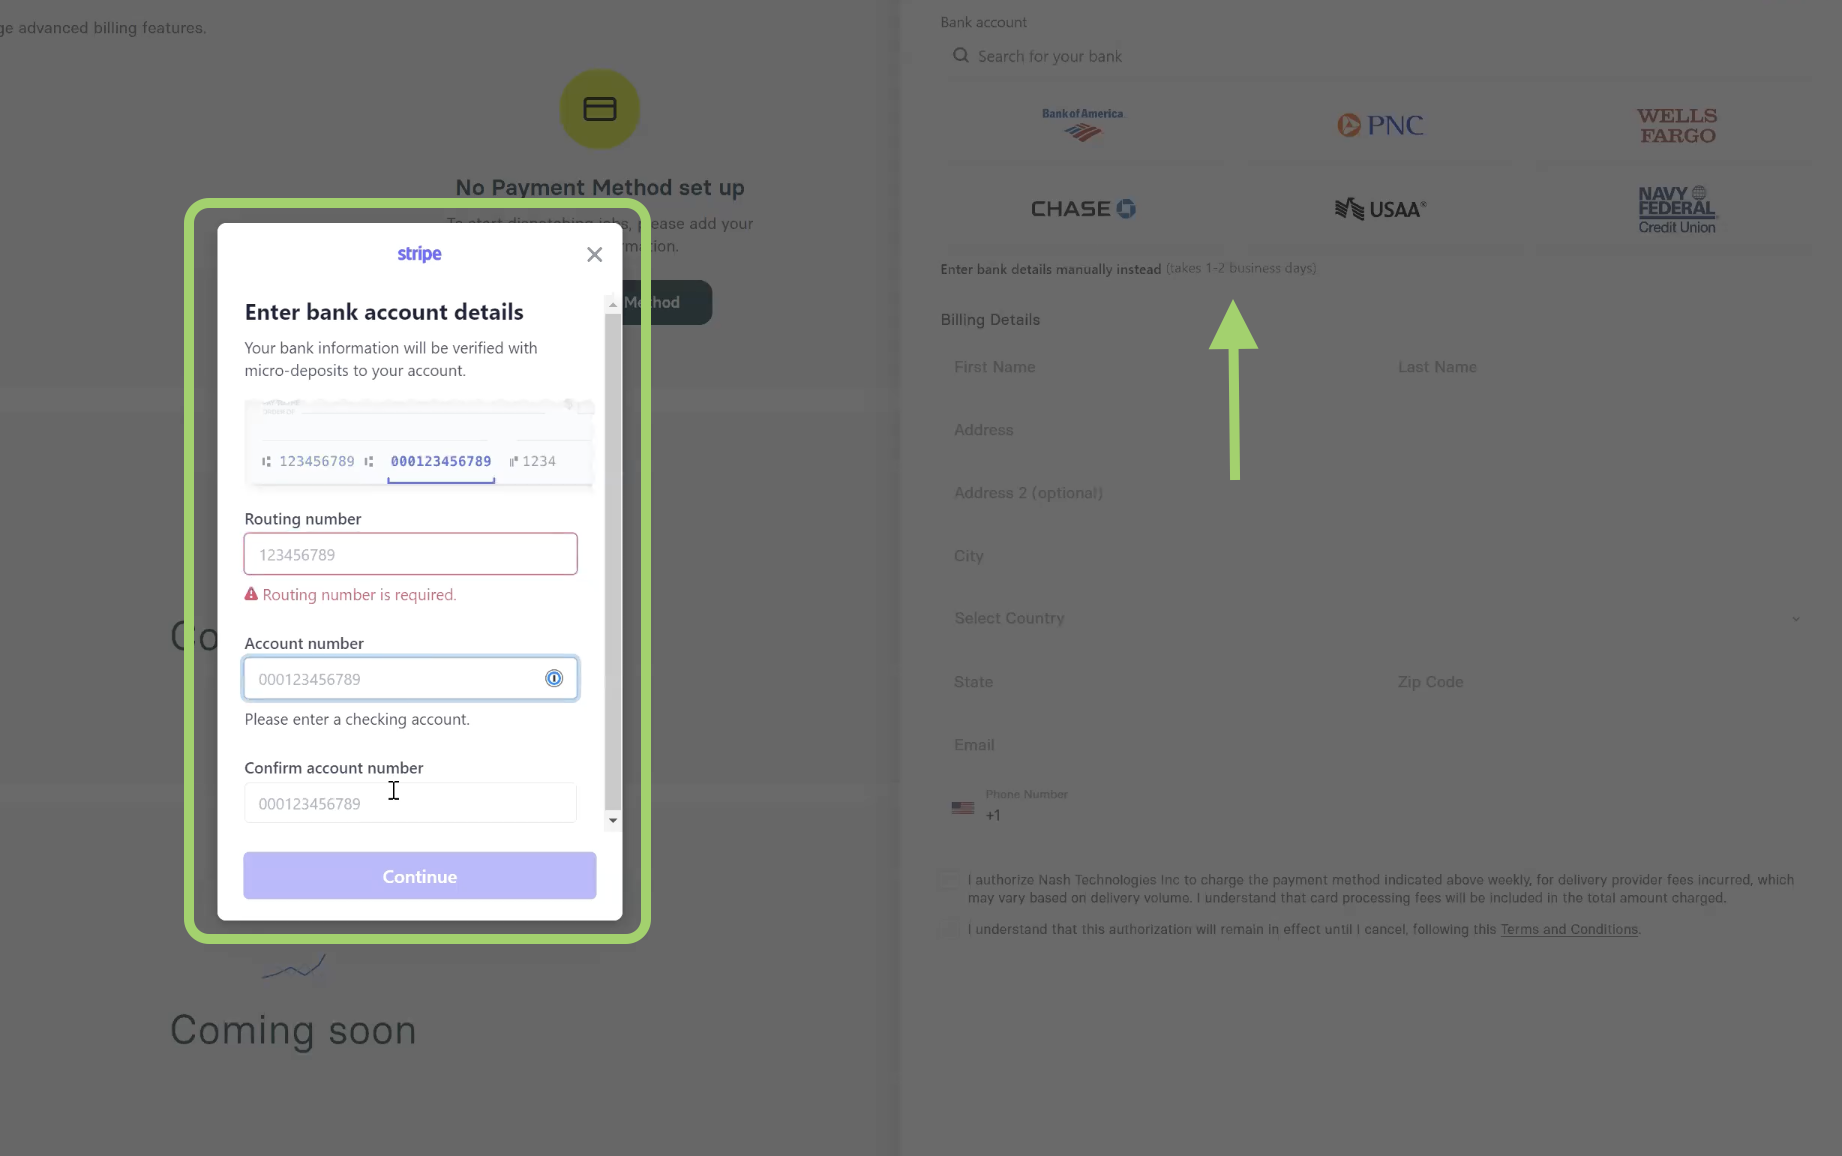
For debits from checking:
Follow the instructions to enter your account details.
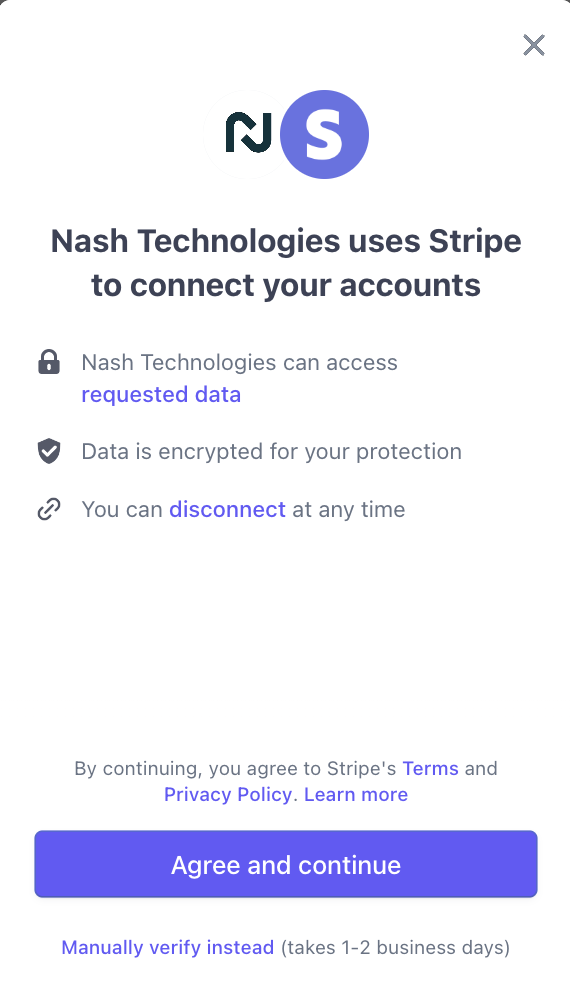
Nash partners with Stripe to ensure your financial information remains secure.
If you prefer to go directly to Stripe to enter your information or have any
issues entering bank details in the side drawer window, click the link at the
top of the Manage billing page. This will open a Stripe window outside of Nash,
and you may proceed from there. 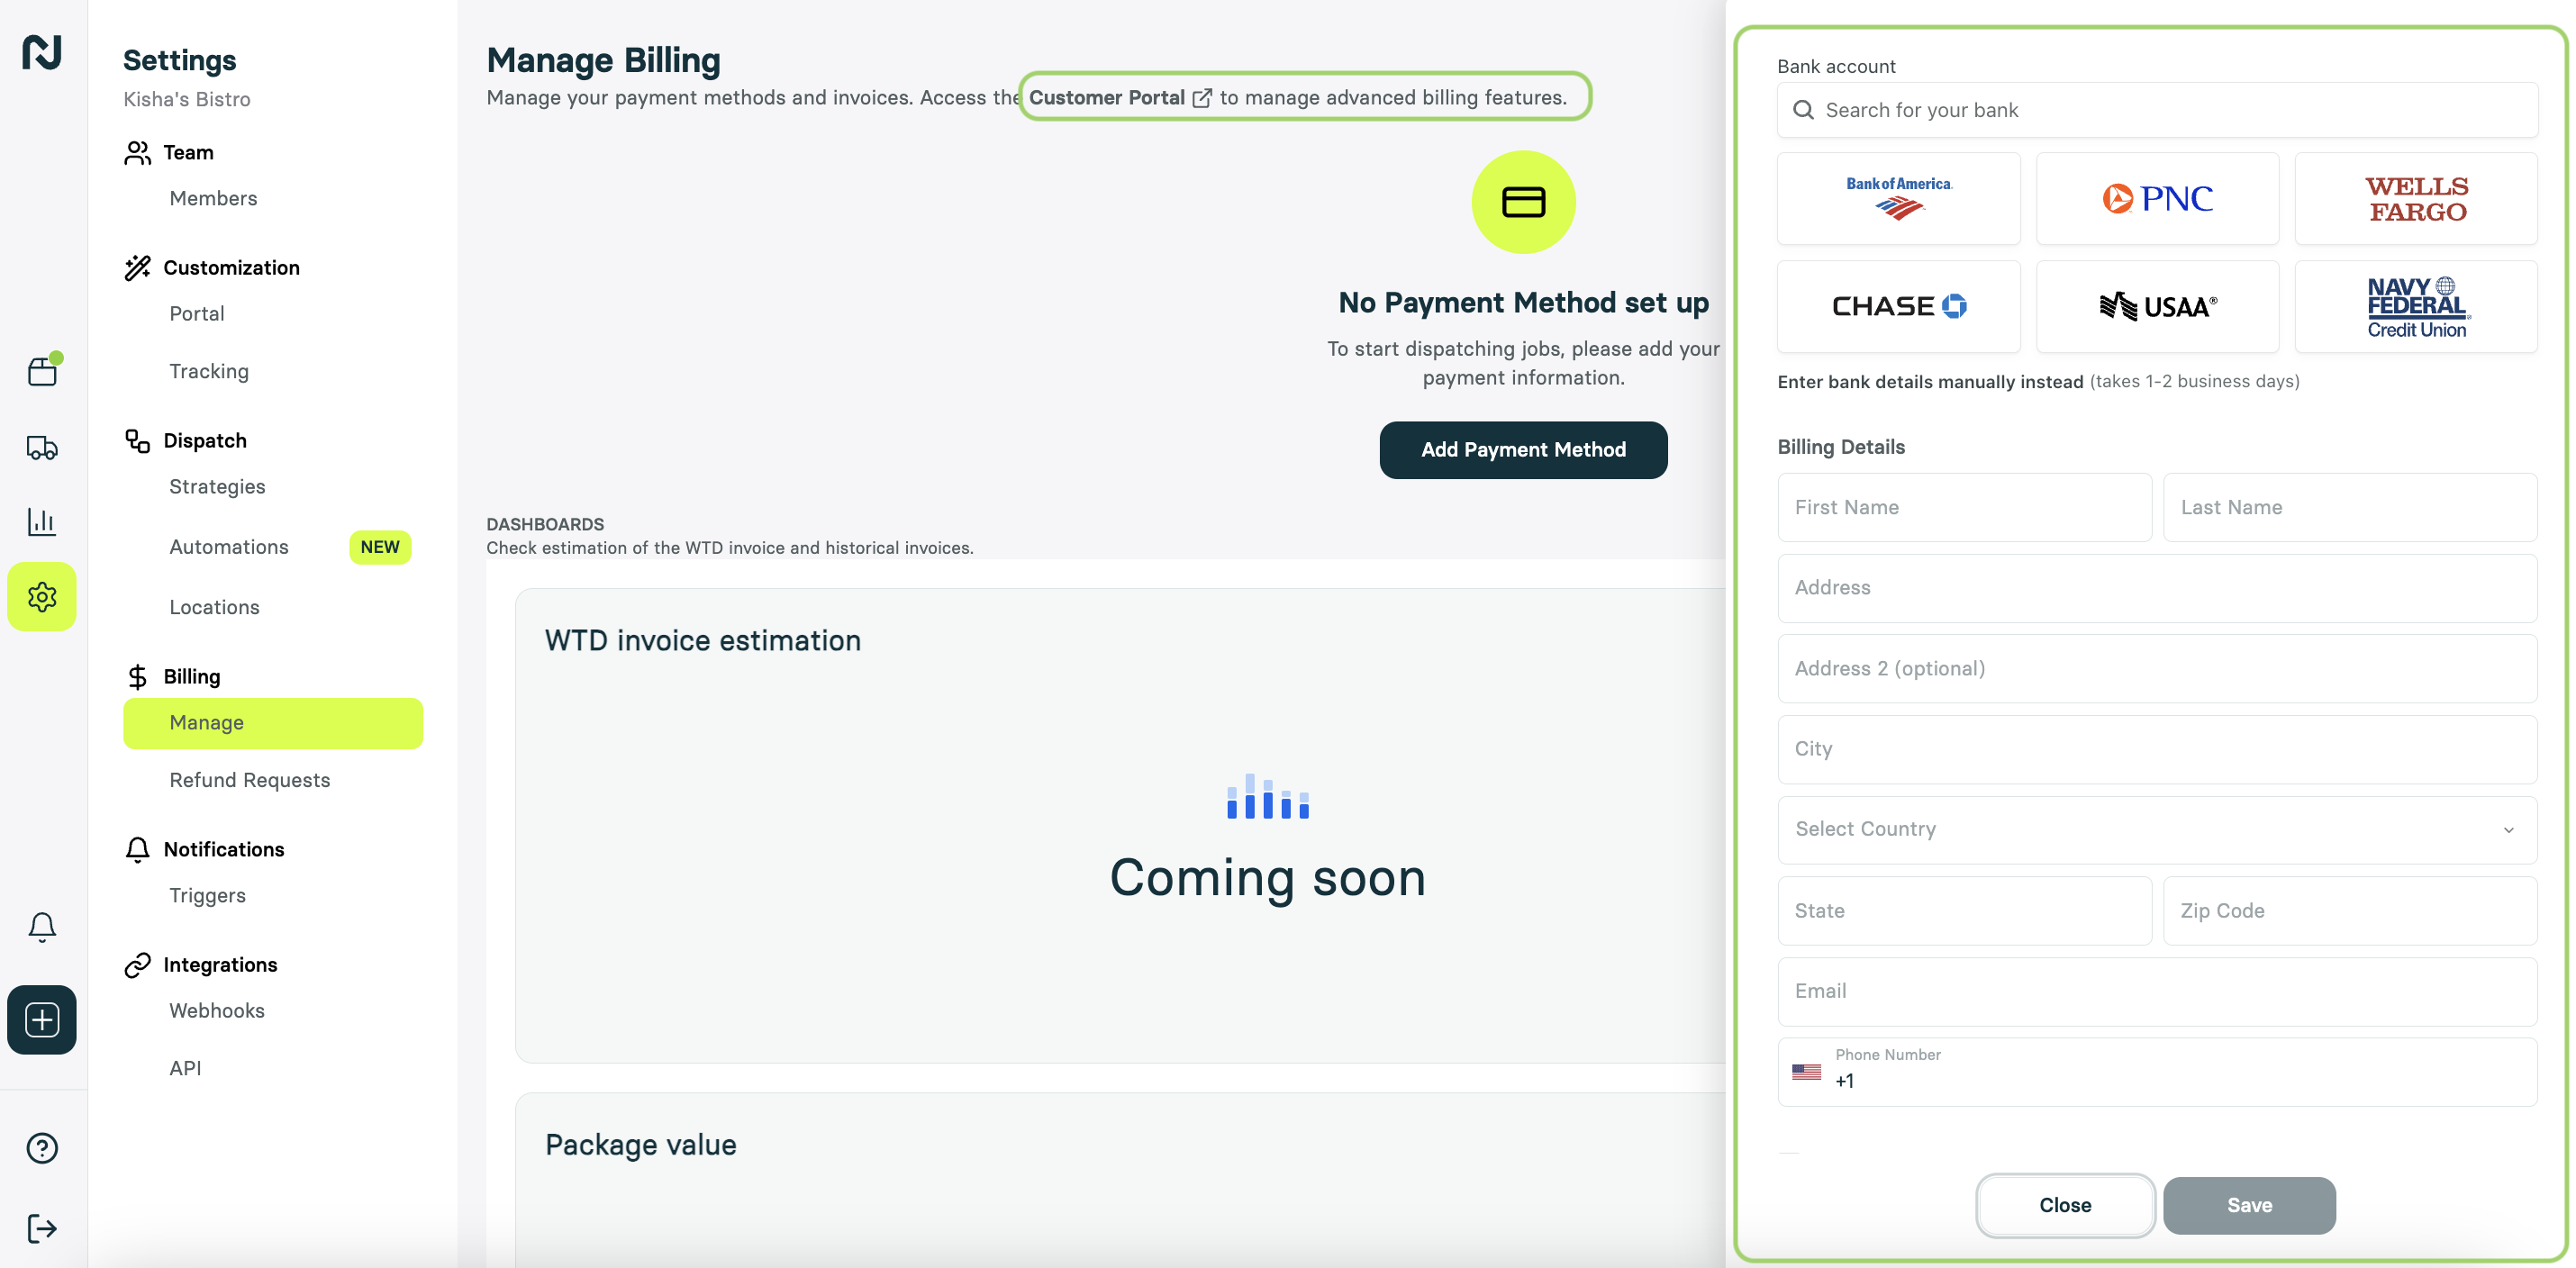
Select US Bank Account from the options.
Search for your bank in the dropdown.
If you can't find it, verify the legal name on the bank's website. This information can normally be found at the bottom of the page on the bank's website.
If your bank isn't listed, choose Enter bank details manually instead and provide your account and routing numbers.
You will be prompted about Nash using Stripe to process payments. Click Agree and Continue.
You will be routed to Stripes secure payment processing. Enter your online banking credentials. Nash can't see this information.
Note that your sign-on information is being entered securely via Stripe and
Nash cannot see your username or password, nor will we ever ask for this
information.
Steps to connect your bank account via Stripe are going to depend on your bank and its connection with Stripe. The Stripe application and your bank will provide necessary prompts via their secure lines of communication. Some common methods of authentication are:
Verify the request by an email sent from your bank
Entering a secure passcode sent from your bank
Verification through Micro deposits. If you elect micro-deposit verification with Stripe, you'll receive an email with instructions to complete that process with a verification code.
You will be redirected back to the Nash Portal. Click Continue with Nash Technologies to finish setting up your payment method.
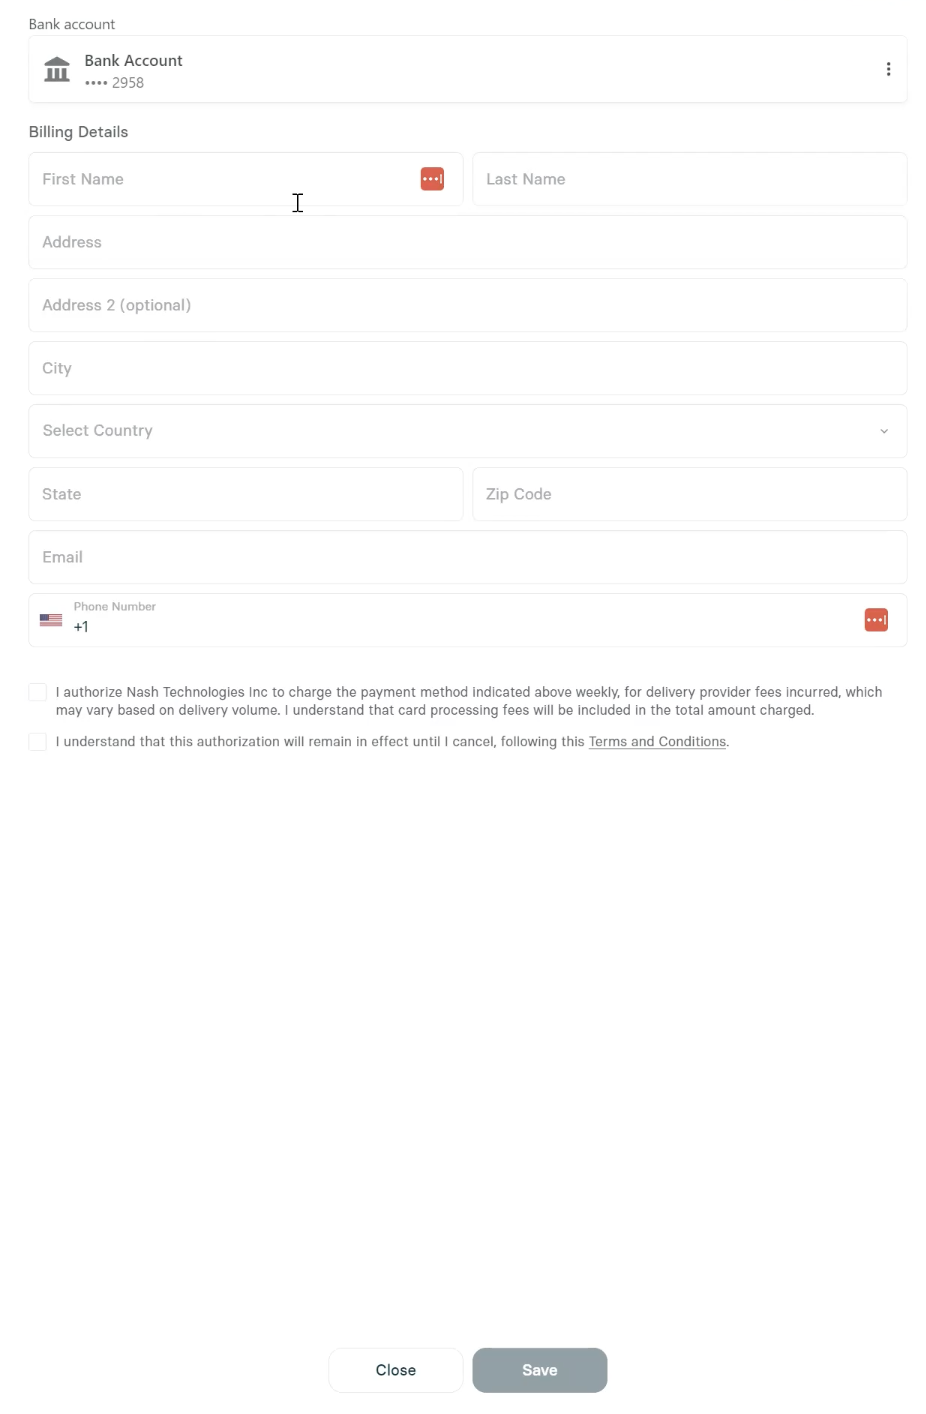
Fill out any additional billing information.
Check the boxes to authorize charges and accept the Terms and Conditions.
Click Submit to complete the process.
You'll get an email from Stripe confirming your account is linked.
If you elected micro-deposit verification with Stripe, you'll receive an email with instructions to complete that process with a verification code.
You can follow the process between Stripe and your bank by providing the necessary verification information
This code will expire in 10 days if not entered, and you will have to re-enter banking details
After Linking Your Account
Billing Cycle: Nash bills weekly, automatically charging your payment method.
Invoice Access: View invoice details in the Nash dashboard.
Payment Updates: Update your payment method at any time.
Important Note
Some banks may require advance notification of Stripe’s ACH company IDs to avoid declined payments. Share these IDs with your bank:
1800948598 - Stripe Payments Company
4270465600 - Stripe Payments Company
By setting up your payment method, you’ll streamline billing and ensure seamless delivery operations.
4o