How locations and zones work
Last updated: September 1, 2026
Locations, zones, and route restrictions look like three unrelated corners of the portal — one where you save addresses, one where you draw delivery areas, one where you draw no-go areas. Underneath, they're closer than they look: all three are built on the same picture of the map. You either mark a point on it or trace an area over it, and what changes from one surface to the next isn't the map — it's the job Nash does with what you drew. This article is about that shared foundation, and about the three different jobs the same geometry gets put to.
Before the detail, one boundary that runs through everything below: locations, zones, and restrictions are geography you own and edit; they never move an order by themselves. They're read at dispatch and routing time — Nash dispatches the order, the optimizer plans the route inside the geography you've defined, and a provider or your own fleet actually drives it. Nothing on these pages performs a delivery or steers a vehicle; it describes the ground the delivery runs on.
The shared geography
Start with the one thing all three share. Whenever you describe where something is in Nash, you do it one of two ways:
- A point — a single spot on the map, pinned to a real street address.
- An area — a region, built either by listing places (countries, states, cities, zip codes) or by drawing a shape on the map.
That's the whole primitive. Everything on these pages is one of those two, and the three objects you actually work with are just three different answers to "what should Nash do with this point or area?"
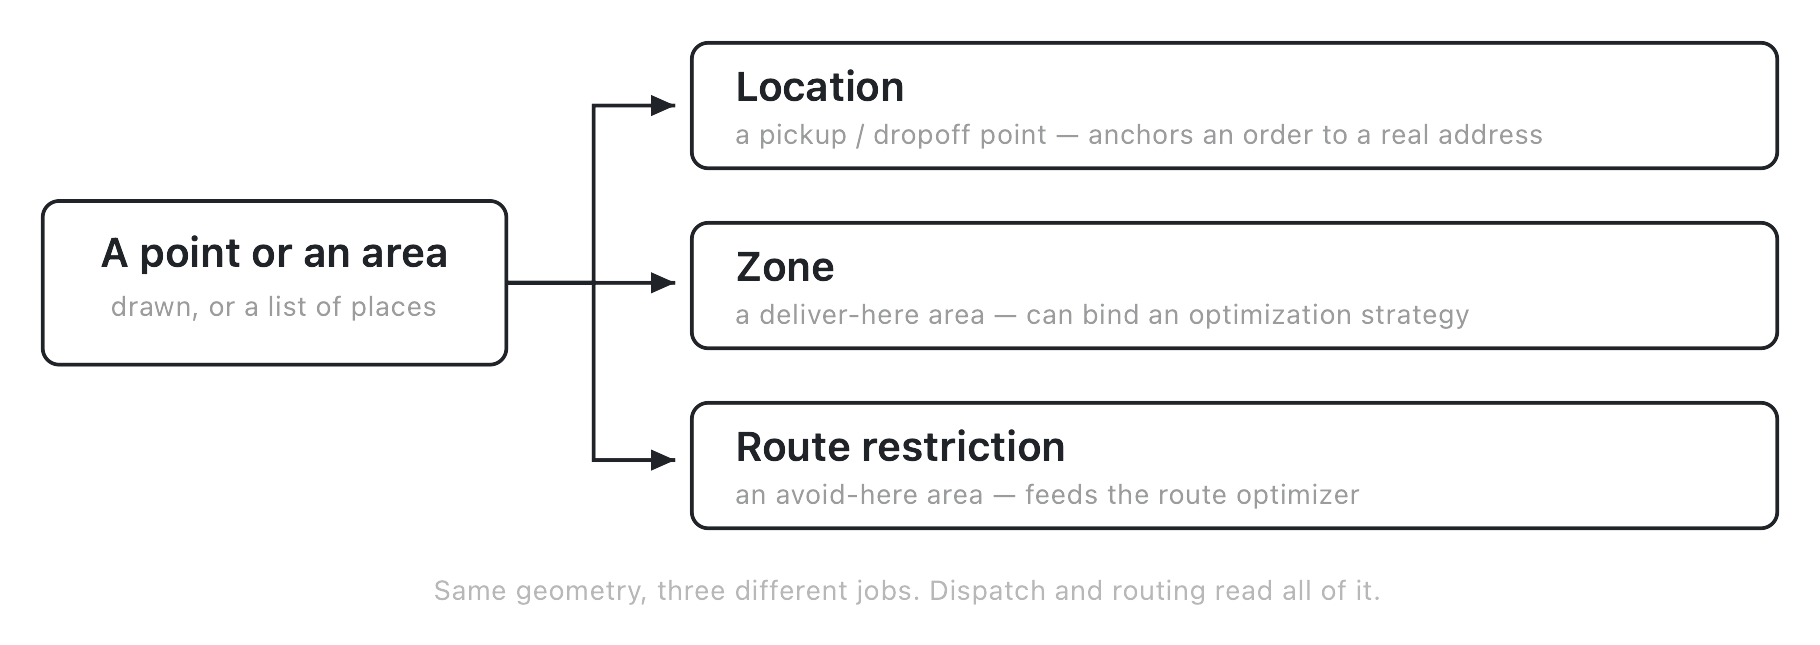
- A location takes a point and makes it a place an order can start from or end at — a store you pick up from, or an address you drop off to.
- A zone takes an area and makes it a deliver-here region — the ground you cover, which an order's dropoff can be matched to, and which can change how routing behaves inside it.
- A route restriction takes an area and makes it an avoid-here region — ground the multi-stop route optimizer must not enter.
Same geometry, three different jobs. Hold onto that framing; the rest of this article is just each job in turn, and how each one reaches dispatch and routing.
Locations: the points an order moves between
A location is the point record — a saved place, pinned to a real address, that you attach to orders by name instead of retyping the address every time. Locations are what anchor an order to the physical world: every order starts somewhere and ends somewhere, and those two ends are locations.
There are two kinds, and how much each one carries is the thing to understand:
- A pickup location is a store or depot you dispatch from, and it's the rich record. Beyond the address, it holds a store contact, pickup instructions, and a service time — and, depending on how your organization is set up, several more steps for routing behavior, the zones the store belongs to, a connected sales channel's settings, per-provider details, and the products stocked there. A pickup location is where a lot of an order's downstream behavior is really configured.
- A dropoff location is a recurring delivery address, and it's the light record: a name, an address, and an optional contact. No service time, no zones, no provider settings — just a destination you'd rather not retype.
One saved place can serve as both — a location can be a pickup and a dropoff at once. The kind isn't a separate database of stores versus addresses; it's what role the point plays for an order.
Because the pickup form grows or shrinks with your setup, don't be thrown if you see fewer steps than a colleague at another organization: the extra steps — routing, zones, a connected sales channel, providers, inventory — appear only when that capability applies to you. Which steps show up, and every field on each one, is laid out in the pickup location settings reference; the walkthrough for saving pickup and dropoff locations is in set up your pickup and dropoff locations.
Locations are available to every organization — there's nothing to enable. The one thing worth flagging is that deleting a location happens immediately, with no confirmation step, so it's worth being sure of the row before you remove it.
Zones: where you deliver
A zone is an area with a deliver-here job. It's a named coverage area paired with the store locations it applies to, and it's how you tell the rest of Nash the shape of the ground you serve.
The coverage itself is built from a mix of categories — you can list whole countries, states, cities, zip codes, or city-and-zip pairs, and you can draw a polygon on the map for an area that doesn't follow a named boundary. A single zone can combine several of these; the full set of categories and how polygon drawing works is in the zone coverage reference, and the list, create/edit, and import/export flow is in manage zones.
A zone earns its place by doing two things once it exists:
- It gives an order's dropoff somewhere to match. When a delivery's destination falls inside a zone's coverage, Nash can reason about it as "this order is in that zone" rather than as a bare address — which is what lets geography-aware behavior downstream treat the order consistently.
- It can carry an optimization strategy. A zone can be bound to an optimization strategy, so routing behaves differently inside that area than it does elsewhere. That binding is what turns a zone from a passive description of coverage into something that actually changes how routes get planned within it. The binding is set up on the strategy side, not on the zone — see optimization strategies.
Note
Zones availability varies by organization — reach out to Nash for access. Everything about how a zone works is the same once you have it; whether the Zones surface appears at all is the part that varies.
A zone on its own, unbound and unmatched, is just a saved shape. It starts shaping deliveries only when an order's dropoff lands in it, or when a strategy is bound to it — never on its own.
Route restrictions: where routes must not go
A route restriction is an area with the opposite job: avoid-here. It's one or more polygons you draw on the map, named as a set, that the multi-stop route optimizer must not route through — a construction site, a bridge you can't send vehicles over, a stretch you simply don't want routes crossing.
The most important thing about a route restriction is what it does not do until you connect it to something:
Important
A route restriction does nothing on its own. It takes effect only once you attach it to an optimization strategy or pick it in the Optimize flow for a single run. Drawing a restriction just adds it to your library of avoid-areas; the attachment is what makes the optimizer honor it. See optimize orders and optimization strategies for where that connection is made.
That's the whole activation model, and it's why route restrictions live in this object but reach their effect over in optimization: you build the avoid-area here, and you apply it there.
One detail that's easy to misread. When you draw a restriction, the form offers an Active period — a set of optional date and time fields. Those fields are informational only. They do not schedule anything: the optimizer honors the polygons — the avoid-areas themselves — not the times you type next to them. A restriction with an Active period filled in still applies whenever it's attached to a strategy or picked in the Optimize flow, regardless of the dates and times. Treat the Active period as a note to yourself about when a restriction is meant to matter, never as an on/off timer that turns the avoid-area on and off. The step-by-step for drawing and managing restrictions is in create route restrictions.
Note
Route restrictions is a beta feature. Reach out to Nash if you'd like early access.
What affects this
Locations, zones, and route restrictions are the inputs to dispatch and routing, not the machinery that runs them. It's worth being precise about where each one is felt, because none of these pages runs an optimization or picks a provider themselves — they're read by surfaces that do.
| This geography | Where it's read | What it does there |
|---|---|---|
| A pickup or dropoff location | Every order | Anchors the order to a real address — the point a route starts from or ends at, and the store whose settings shape how the order is handled |
| A pickup location's routing and provider steps | Dispatch and route timing | Feed store-level behavior — service time, return-to-store, per-provider details — into how the order is quoted and how its route is timed |
| A zone matched to a dropoff | Dispatch and routing | Lets Nash reason about the order by area rather than by bare address, so geography-aware behavior treats it consistently |
| A zone bound to an optimization strategy | The route optimizer | Makes routing behave differently inside that area — the strategy, not the zone, carries the routing rules |
| A route restriction attached to a strategy or picked in Optimize | The route optimizer | Marks polygons the optimizer must not route through when planning multi-stop routes |
The through-line: this object supplies the geography; the decisions that consume it live elsewhere. How a winning provider gets chosen for an order is how dispatch works. How multi-stop routes are actually planned — and where zones and restrictions get honored — is how optimization works and optimization strategies. This page deliberately stops at the edge of those: it explains what you're feeding in, not how the optimizer weighs it.
And the boundary the whole object sits inside, one more time: the routing engine reads your locations, zones, and restrictions and plans within them — Nash dispatches the order, the optimizer plans the route, and the provider or your own fleet is who drives it. Drawing an avoid-area or a coverage zone shapes the plan; it's never Nash avoiding a street or delivering to a neighborhood itself. You define the ground; dispatch and routing decide what happens on it.
For the shorter tour of all three surfaces and where to find them, see the locations and zones overview.